

Key takeaways
- Ice shaver and spare blade
- Syrups in squeeze bottles, plus labels
- Cups, cones, spoon straws and napkins
- Handwashing setup and sanitizer, as required locally
- Trash bins and cleaning supplies
- Menu board with clear prices and allergen notes
- Cash box and card reader
- Extension cords and a backup power plan
To start a shaved ice stand, you need a reliable ice shaver, a way to keep ice frozen, shade, power, serving supplies and the permits your local health department requires. Begin small, test at a few events, and let real sales guide your upgrades rather than buying a trailer on day one.
| Item | Best for | Key feature |
|---|---|---|
| E-Z UP Pop-Up Canopy | Shade and branding | Quick setup tent frame for events |
| YETI Tundra Cooler | Keeping ice frozen | Heavy insulation for long days |
| Honda EU2200i Portable Generator | Power where there is no outlet | Quiet inverter generator |
| Square Reader for Contactless and Chip | Taking cards | Compact reader that works with phones |
| Cambro Camtainer Food Pan Carrier | Transporting supplies | Stackable, insulated carrier |
Step 1: Check Rules and Permits
Before buying anything, call your local health department. Requirements for temporary and mobile food vendors differ widely, and some areas have strict rules about equipment, handwashing, water supply and ice sources. Ask about event permits, business licenses, sales tax registration and insurance. Many events also require proof of liability coverage. It costs little to ask and can save you from buying equipment that will not pass inspection.
Step 2: Choose Your Machine and Concept
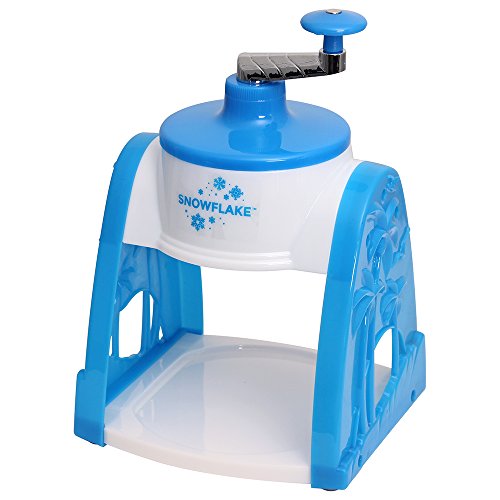
Decide whether you will sell classic crunchy snow cones or fluffy shave ice with toppings. That choice drives your machine, syrups and pricing. Machines vary from heavy-duty crushers to fine block shavers; see our guide to commercial machines for details. Whichever you pick, buy a backup blade or plan for a quick repair, because a broken machine in the middle of a hot Saturday is lost income.
Step 3: Shade and Setup
A canopy protects you, your ice and your customers from sun and light rain. A well-known pop-up like an E-Z UP pop-up canopy goes up quickly with two people and is easy to brand with sidewalls or a banner. Use weights on the legs, because wind can turn a canopy into a hazard. Check that the size fits your table, cooler and machine with room to move.
Step 4: Keep Ice Frozen
Ice management makes or breaks the day. A premium cooler such as a YETI Tundra cooler holds ice longer than standard coolers, so you refill less and waste less. Pre-chill the cooler, pack blocks tightly and open it only when needed. Keep syrups in a separate cooler so they stay cold without sitting on ice. If you plan to haul prepared food-grade ice, ask your health department about approved sources.
Step 5: Plan Your Power
Many events provide electricity, but not all, and outlets may be far from your table. A quiet inverter generator like the Honda EU2200i is a popular choice for vendors because it runs relatively quietly. Confirm your machine’s power draw and the generator’s rating before buying, and check event rules, as some venues restrict generators. Carry heavy-duty, outdoor-rated extension cords and follow safety instructions about fuel and ventilation.
Step 6: Take Payments
Customers increasingly expect cards. A small reader such as the Square Reader for contactless and chip connects to a phone or tablet and lets you accept cards and tap-to-pay. Keep some cash for change, and have a backup plan for places with poor cell coverage. Review the processor’s fees and terms before relying on it.
Step 7: Transport and Organize
Insulated carriers help move syrups, cups and toppings. A Cambro Camtainer food pan carrier is a common sight in catering because it stacks and protects supplies. Organize your stand into zones: ice and shaving, flavoring, payment. A clear workflow reduces lines and mistakes.
Starter Supply List
- Ice shaver and spare blade
- Syrups in squeeze bottles, plus labels
- Cups, cones, spoon straws and napkins
- Handwashing setup and sanitizer, as required locally
- Trash bins and cleaning supplies
- Menu board with clear prices and allergen notes
- Cash box and card reader
- Extension cords and a backup power plan
Menu, Pricing and Marketing
A tight menu keeps service quick and costs predictable. Start with a handful of flavors that appeal broadly, then offer two or three sizes. Add a few extras such as toppings or a special flavor of the day, but resist the urge to overcomplicate. Price items by considering your ingredient and packaging costs, event fees and the time you spend, and compare your pricing with local competitors. Post your menu in large, clear text so people can decide while they wait, and list allergens where relevant.
Marketing for a small stand is largely local. Choose a recognizable name, a simple logo and a colorful sign that can be seen from across a parking lot. Take clear photos of your product and post them on social media with your event schedule, so regulars know where to find you. Partner with schools, sports leagues and community groups, which often need vendors for fundraisers and tournaments. Collect feedback from customers and adjust your flavors accordingly.
Think about the customer experience as well. Fast service, a friendly attitude and a tidy stand matter more than fancy equipment. Keep the line moving by pre-labeling syrups, preparing cups in advance and assigning roles during busy times. In very hot weather, offer shaded seating or at least a shaded queue area if you have space, since people are more likely to buy when waiting is comfortable.
When the season ends, review your numbers. Note which events were profitable, which flavors sold out, and which equipment gave trouble. Use that information to decide whether to add a second machine, move to a trailer, or specialize in a certain event type. Careful tracking turns a hobby stand into a small business with a plan.
Setting Up on Event Day
Arrive early and walk through your layout before you unpack. Place the canopy first, secure it, then position the table so that customers approach from one side and your supplies sit on the other. Put the ice shaver on a stable surface in the shade, and keep the cooler close enough that you do not leave the station to refill. Set up handwashing and sanitizing supplies as your local rules require. Test the machine, prepare a few cups of ice and taste your syrups so you are ready when the first customer arrives. Keep a small kit with tape, zip ties, scissors, extra cups and a first-aid pack, because small problems come up at nearly every event.
Common Mistakes
- Buying equipment before checking local permits.
- Underestimating how much ice you will use.
- Setting up in direct sun without shade.
- Ignoring power needs.
- Offering too many flavors and slowing the line.
- Failing to track sales, costs and weather.
Frequently Asked Questions
How much space do I need?
A standard canopy frame is a common starting size, but make sure your table, cooler and supplies fit comfortably.
What flavors should I start with?
Begin with a limited menu of classics such as cherry, blue raspberry, grape and a tropical option. Expand based on sales.
Do I need a generator?
Only if events lack power. Always check venue rules and what your machine needs.
How do I keep the stand clean?
Wipe surfaces regularly, clean machine parts as instructed, and follow local health guidelines for sanitizing.
Conclusion
A shaved ice stand is a straightforward business to start but easy to underestimate. Handle permits first, pick a concept, protect your ice, plan power and payments, and keep the setup simple until sales justify more.
As an Amazon Associate we earn from qualifying purchases.
More from Amazon
Programs that pair well with the guide above. Offers and eligibility are set by Amazon and may change.
Set up recurring deliveries of everyday items on eligible products. Terms and savings are set by Amazon.
Explore Subscribe & SaveCollect the home and kitchen items you want in one registry that guests can shop from.
Create a wedding registryFree shipping on eligible items, Prime Video and more. Eligible new members can start with a free trial.
Start a Prime free trialAudiobooks and podcasts to listen to on the go. Eligible new members can start with a free trial.
Try Audible freeAs an Amazon Associate we earn from qualifying purchases.




Write Your Review
No reviews yet. Be the first to share your experience!